Menu


In early 2021, Google Data Studio released a new feature called ‘Draft Mode’, and it’s incredibly smart. In fact, you’ll wish all your web tools had a feature like this. It’s called Report Publishing. So what is it, and why is it so helpful?
Traditionally, Data Studio reports are always live, at least to anyone who has the link. If you’ve shared a report with a manager, a client, or a teammate, whenever they want to review the data, they could go back to the link and see it updated with the latest stats and analytics.
While this live mode is great most of the time, what if you want to make edits? Anyone viewing it live could, theoretically, see you making edits to the data or display in real-time, adding a chart here, creating a filter there, etc. This isn’t ideal if while a client is trying to gain insights and analyze data, the report is changing.
Report Publishing solves this problem by creating a published and draft version of the dashboard. Turning on Report Publishing means that any change you make to the report won’t go live until you hit a new “publish” button and push edits to the live, viewable report.
This includes, but isn’t limited to:
On the other hand, some changes will affect the published version, even if you’re in draft mode. These include:
So in short, if you’re going to edit anything cosmetic or alter existing data, you’re in the clear to do that in draft mode. However, if you edit the underlying data source, you’re going to see some errors in the published version.
Turning on Report Publishing in Google Data Studio is simple.
Step 1: Click “File” at the top of the page. Then, click “Publishing settings”.
Step 2: Once you do that, a popup will show on the screen asking if you want to turn on report publishing.
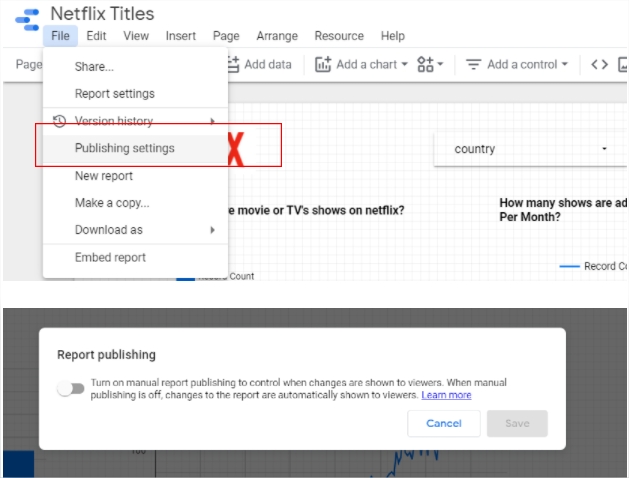
Step 3: Click the switcher to turn it on and click save.
Once you’ve done that, you’ll notice a few changes to the top of your screen. First, next to the report title, there’s a little blurb that says “Draft version” with a yellow button. That shows you that you’re currently in draft mode. Any edits you make won’t go live until you click that blurb and then click “Publish”.
Additionally, there is a publish button on the top right side next to the share features. Once you’ve made any edits, you could also click that button to publish the changes to the live version.

From here on out, you’re in draft mode, requiring you to publish any new change. To turn off this feature altogether, and return to the usual “always live” version, go back to “Publishing settings” under “File” and switch report publishing off.
On a related note, there’s one more new feature you should know. It’s called Present Mode. This too solves a needed problem in Data Studio which is making the dashboard appear in a full-screen display.
Before now, the content always lived below the URL and browser tabs, etc. It was all a little distracting, especially if you were showcasing the report in a meeting. With Present Mode, you can make the report occupy the whole screen with no distractions.
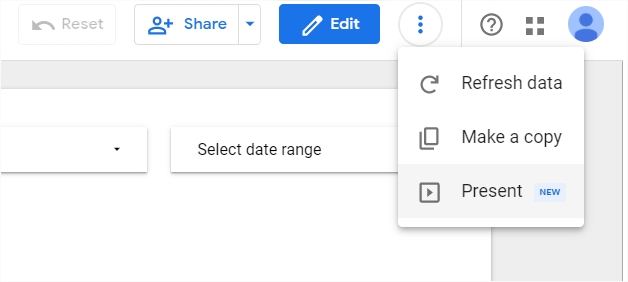
To turn it on, first make sure you’re in “View,” not “Edit” mode. Then, click the three vertical dots at the top of the screen next to the “View/Edit” button. The last option says Present.
Try it out in your next meeting!