Menu

There is nothing worse than spending the time to craft a beautiful dashboard only to have a coworker, manager, or stakeholder look at it once and forget about it. Doesn’t that defeat the whole point? The beauty of Looker Studio (formerly Google Data Studio) is, that the metrics within the charts and tables update in real-time as the data changes and comes into the platform. Whenever someone looks at your dashboard again, be it a week, month, or quarter later, there will be new data to observe.
Google may have expected this problem when they added the email delivery tool (perhaps a Data Studio project manager at Google got tired of his supervisor neglecting his dashboards). In this quick guide, we’ll cover each step to scheduling an email delivery of your Data Studio report.
But first, here are three reasons you should schedule Data Studio Email deliveries.
Time needed: 10 minutes
How to set up and schedule automated emails for Google Data Studio
On the top menu bar in your Data Studio report, click the little arrow next to the share button. Make sure you have edit access to the report. If you don’t, you won’t be able to schedule an email delivery.
Your name is already on the recipient list. You can leave it there so that you have confirmation of a successful delivery each send date, or if you choose, you can remove yourself. Add up to 50 names on the “to” line. They don’t need a Google account to be added to the list.
Click the box below the recipient list to customize your message. Google lets you change the subject line (it’s the report title by default) and add a message. You don’t need to include any links or attachments in the message. Google will take care of that for you. Just keep this short and simple, reminding people why they are receiving it or the action items they need to take as a result.
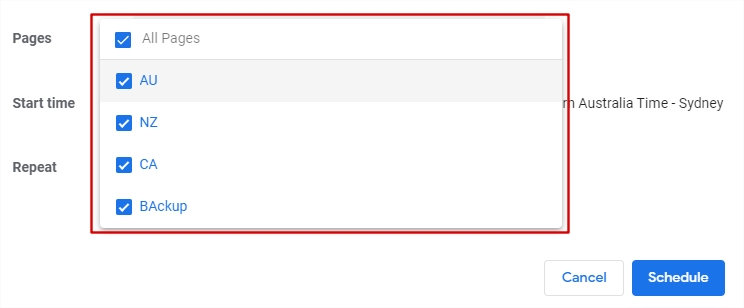
Most likely, you want to include every page of your report, but if not, make the change below the message. Here’s a good place to note that Google will send a PDF handout (with the specified pages) an embedded preview of the dashboard, and a link to the live URL. Everyone prefers digesting their reports a different way, and Google automatically gives them every option. 
Based on whichever date you include as the first delivery, Google will suggest a weekly or monthly send on that same day of the week going forward. You can also send the report daily, every weekday, or choose a custom number of days to leave between each send.
If you need to edit the message, schedule, or eventually delete the email delivery, you can do so by repeating Step 1 and opening the email delivery options again.
Finally, here’s how the report looks in your inbox:
And once you’ve opened the report:
The PDF is attached to the email.
If you know you’ll be sending recurring email deliveries, you can do some playful things on your dashboard to acknowledge the frequency. For example, this template, available in our store, lists the date and a little note at the top of each report.
Get a Premium GA4 Template for FREE
A marketplace to buy and sell 100’s of high quality templates, dashboards and reports from Looker Studio templates to Contracts and SOWs. Instant download and product support is what sets us apart.