Menu


Within Google Analytics, user permissions govern what users can do and the data that they can access. In this article, we are going to explore the structure of Google Analytics, user permissions and their privileges and how to assign the necessary permissions to enable a user to connect GA to GDS.
This report is a continuation of our previous report, ‘How to: Connect Google Analytics to Google Data Studio.
This report consists of 4 sections:
Google Analytics allows only the account owner to assign user permissions at 3 different levels. These levels reflect the hierarchical structure of every organisation within Google Analytics. An organisation is the collection of products and users, and every Google Analytics organisation is made up of:
Users can be added to Google Analytics at an account, property or view level and this determines their user permissions.
At the account level, the user is assigned the greatest permissions and has access to every property and view in that account.
At the property level, users have access to every view within that property, but that access is limited to one specific property.
At the view level, users only have access to that specific view within the individual property.

There are 4 main user permissions within Google Analytics and therefore 4 levels of access:
1) Manage Users (account level access)
In order to assign a user the ability to manage other users within an organisation, they need to be added at an account level. This permission enables users to add or delete other users, as well as assign permissions.
*This permission does not include privileges that come with ‘edit’ or ‘collaborate’.
2) Edit Permission (account, property or view level access)
A user can be assigned editing permission at any level within the organisation but it is important to note that this user permission entails different privileges at each level. For example, a user with edit permission at an account level can manage account settings, manage filters, create new properties and more.
A user with edit permissions at a property level can import data, create new views, customise tracking and more but they cannot do anything that a user with the same permission at an account level can do.
*This permission includes privileges that come with ‘collaborate’ and ‘read & analyze’ but not ‘manage users’.
3) Collaborate Permission (account, property or view level access)
Users that are assigned this permission have the ability to create, delete and share personal assets as well as collaborate on them.
*This permission includes privileges that come with ‘reading & analyze’ but not ‘edit’ or ‘manager users’.
4) Read & Analyze (account, property or view level access)
This permission is assigned to users that only need to view data. It allows users to create reports, dashboards and customs segments but not edit data in any way.
*This permission doesn’t include any privileges that come with the other user permissions.
In order to connect Google Analytics with GDS, a user needs to be assigned at least the Read & Analyze permission.
For this example, we are going to add a new user at the view level to assign them the read & analyze permission.
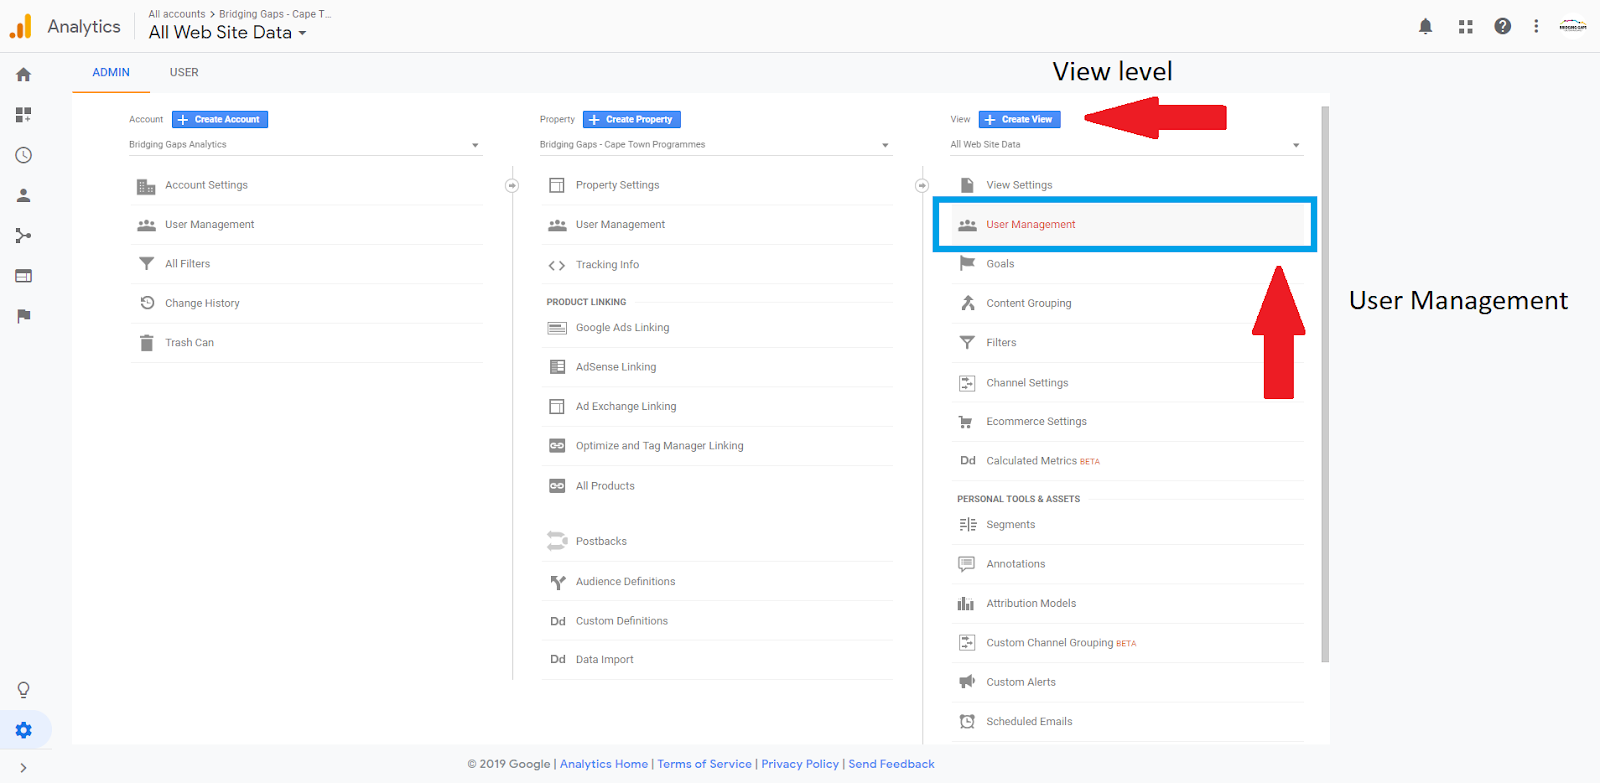
1) The first step is to select the ‘admin’ cog on the bottom left-hand side of the screen in the Google Analytics dashboard.

Next, select ‘user management’ in the View level.
2) Then, click on the ‘+’ sign in the top right-hand corner of the screen and input the new user’s email address.

3) You will then be prompted to select whether or not you would like the new user to be notified via email. Below this, the 4 user permissions will display.
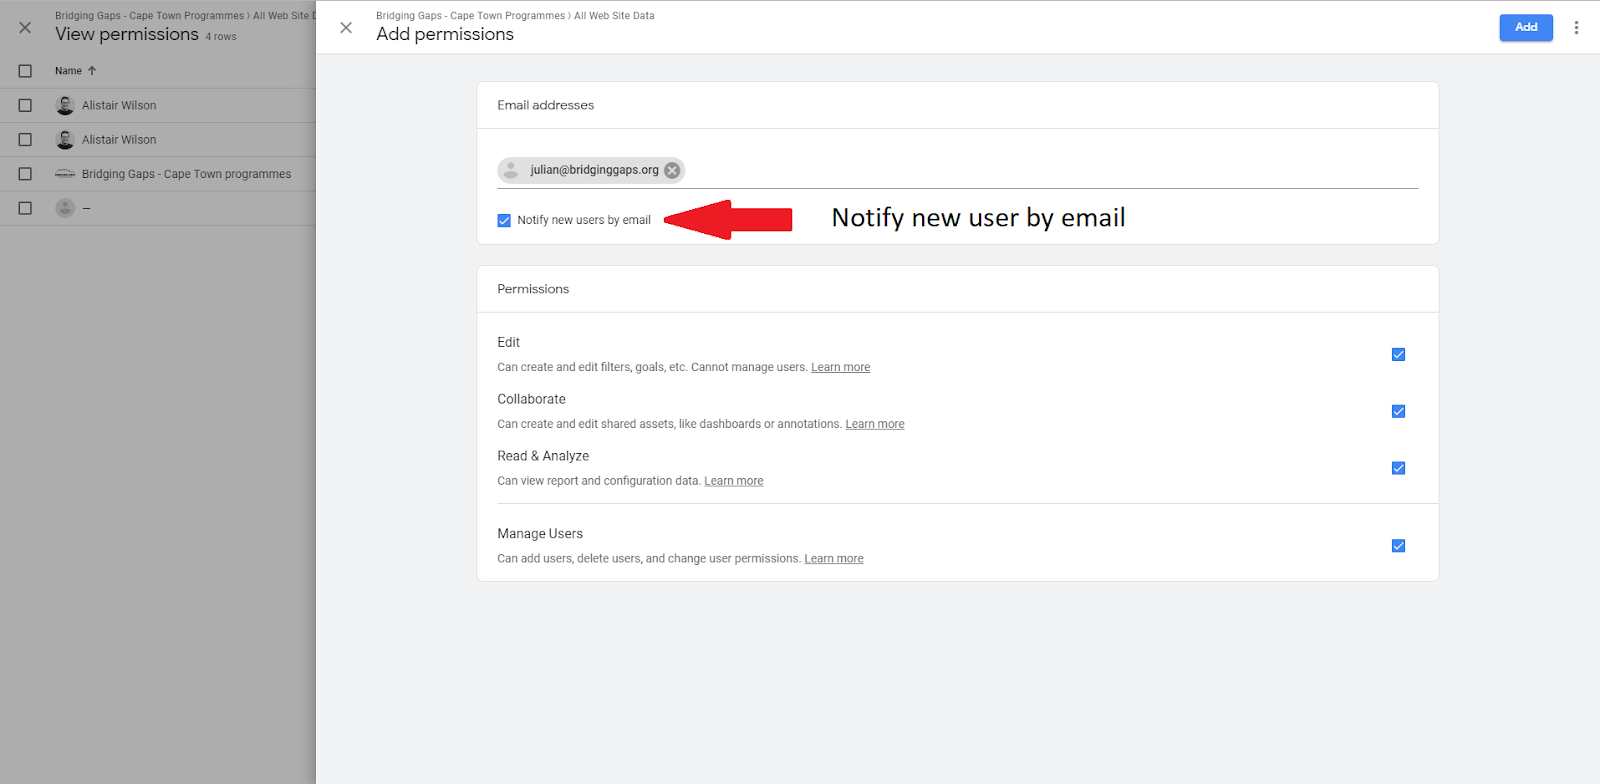
4) Select the check box for ‘read & analyze’.
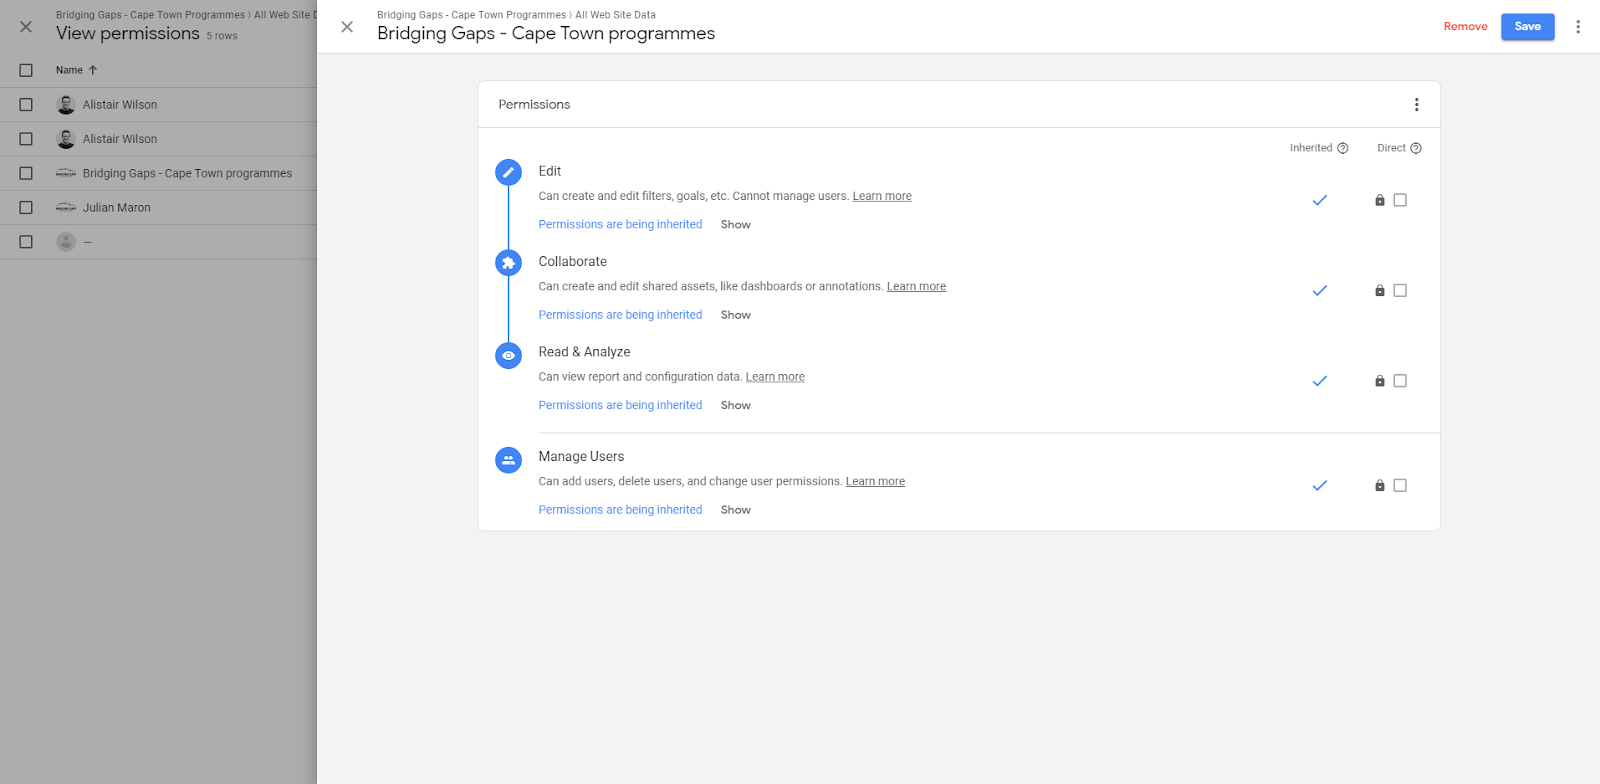
In order to modify an existing user’s permissions, select the desired user from the list displayed in your user management panel.
Once a user has been assigned the appropriate permissions, they are able to create a new data source. This information has been covered in our previous article – ‘How to: Connect Google Analytics to Google Data Studio.