Menu


In this article we show you how to connect Linkedin for free to a Google Looker Studio report. This is extremely useful because as you probably noticed already, LinkedIn’s native reporting lacks views and charts you’d like to see. It’s hard to explore trends across dates or even view multiple metrics at once. The whole thing displays like a bad spreadsheet.
Luckily, Looker Studio can bring LinkedIn metrics to life, enabling you to analyze performance and easily read the data your account collects. There’s only one catch: there’s not a free API connection between LinkedIn ads and Looker Studio. That leaves you with two options:
The first option is to pay for a 3rd party data connector from a company like Supermetrics or Power My Analytics. This is the more convenient option and after setting it up once it allows you to pull in data automatically on an ongoing basis. If you are running ongoing campaigns and want dashboard access to real time data, this is the better option. However, it comes at a monthly price from about $30 upwards per month. We have a Linkedin Ads with Supermetrics connector available here.
The second option is to utilize the Google Sheet connector. This option is free, however, requires manual work whenever you want to import fresh data. This is a better option if you are on a budget or if you are running a limited-time campaign and require limited reporting periods. In this article we show you how to set up this option step by step. Ultimately this data can live on any Dashboard, though the last few steps will be specific to this custom made template, available on our webstore. Let’s get started.
Time needed: 1 hour
Learn how to connect LinkedIn to Google Data Studio for free using Google Sheets as the connector
Go to LinkedIn, and click on the advertise button in the top right corner. If you manage multiple accounts, ensure that you clicked on a single profile you want to analyze. Ultimately, you want to end up on the Campaign Performance page, which should be the first page LinkedIn takes you to after selecting a profile.
Make sure you select the “Campaign Performance” report and break out performance by day.
On that page, you need to do two things. First, set the date range you want to analyze. This can be as little as a few days or as big as a few months. Then, click export from the right-hand side. We want the “Campaign Performance,” report, though you can use any of the available options if you want to come back to them in the future. By default, LinkedIn will export day-by-day metrics. Should you choose, you can pick month-by-month or all time. Finally, click export to download the CSV.
We need to get this data into Google Sheets to use it in Looker Studio. The simplest way is to copy and paste the entire report into a blank Google Sheet. Or, follow these next steps to upload and convert from a CSV to a Google Sheet.
First, open Google Drive and click “New File Upload.” After it’s loaded, click on the file. This will open the document in Google Drive, though it’s not yet a Google Sheet. Click File, then “Save as Google Sheet” to convert your document. Once saved, you can give it a new name like “Q1 LinkedIn Ad Data.”
Remove the first 5 rows of data so that the metric names lay on the first row.
Now that you’re looking at your data in Google Sheets, you need to prepare it to upload into Looker Studio. Notice the first four rows contain metadata about the source and date, followed by a blank fifth row. Delete the first five rows so that the current row 6 becomes row 1. This is important because Looker Studio will use row 1 as the name for your metrics and dimensions. You’re now ready to pull it into Looker Studio.
Open a blank Looker Studio report. When the program asks you to select a data source, choose Google Sheets from the list of free connectors. Looker Studio asks you to select a spreadsheet. Your new spreadsheet should be at the top of the list, but if not, use the search bar or scroll to find it. Select Sheet 1, or the name of the specific sheet, if you had changed it previously.
Select the Google Sheet connector, then choose your spreadsheet from the list. It should be on top!
Using the first row of your data, Looker Studio creates a list of metrics and dimensions available for use across the various charts, tables, and displays within the report. Looker Studio does a good job of recognizing the aggregation and type, for instance, knowing if a stat is a sum or distinct number, or if it’s a percentage or a number. However, should Looker Studio not automatically take on the right display, you can easily fix it from within the list or working with the stat in a chart. Refer to this guide to see which metric should have which aggregation.
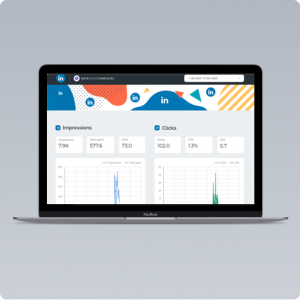
Here’s where we’ll discuss some specifics about the LinkedIn Template and some of the data you’ll find in the “Campaign Performance” report. As the name suggests, the spreadsheet shows data on each active campaign group broken out by day. So if you have multiple campaign groups running, there will be a line of data for each day for each campaign. This lends itself nicely to a date chart where you can see performance across time alongside metrics such as impressions, clicks, and more. In Looker Studio, you’ll be able to see high-level metrics about each campaign such as average cpm or cpc or engagement rate.
Create displays for your data or check out this template for a quicker plug and play experience.
Now, we’re only looking at campaigns. What if you want to dig deeper? Repeat steps 1-3, but this time, generate a different report. The “Ad Performance” report shows similar metrics to the “Campaign Performance” report, only with ad specific data. So, you could analyze all the ads in a single campaign to see which are performing best. Other reports focus on particular campaign types like an audience network, conversion, and conversation campaigns.